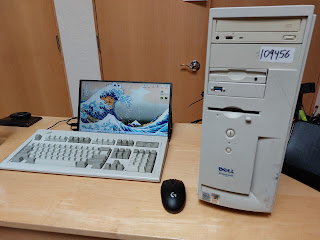
The wallpaper is titled "Sea is for Cookie" from Redditt
Yeah, so I've never been particularly knowledgeable when it came to computers. I swear, I have some sort of curse where the worst that can happen does happen every time. Particularly in the realm of data storage, in which I have never ever gotten a break. So many corrupted files, hard drives, thumb drives, and SD cards. It has created a level of digital paranoia that is quite concerning. But floppys, zips, and CDs don't corrupt. Neither do typewriters for that matter. Fun fact, my keyboard is the same base keyboard as the one on the IBM 2500 series wheelwriter typewriters (among a few others as well).
The Dell Dimension 4100 you see above was made the same year I was born, 2000. I grew up in the age of good technology, Tube TVs, 1 hour photo at Walgreens, and VHS tapes. I hit the sweet spot, remembering the fondest parts of analog tech, and watching the digital age sweep over in full force. It was a sad day when Blockbuster closed, but we did score a ton of cheap movies, so there's that.
My first foray into the world of computing came from a Dell Dimension 4500 from about 2004. It came packed with a Pentium 4 processor, 150gb of HHD storage, 500mb of ram, and an AGP (Accelerated Graphics Port) card that output to VGA. I didn't know the wonder's of HDMI or display port until a decade later. Frankly, I didn't know anything outside of Windows XP for all that time. When the old tower finally caved, I upgraded to an Asus laptop running Windows 7 and rocked that for another 7 years.
I don't like buying the next new thing to hit the shelves as soon as it comes out. I made do with two units over a period of 17 years, and when my laptop finally died it's slow and painful death, I decided I would look into yet another long lasting system. A lot had changed in the world of computing. 1 terabyte drives were a thing, HHD's were no longer a thing, and there were like 50 different types of USB cables (well, like four but it feels like more). The other thing that really kicked me was the lack of optical drives. There is no way these big tech companies were going to trick me into paying for premium subscriptions when I already owned the software on a CD. Not to mention every single solid state drive I had ever used failed on me, so removable storage is a god-send for data backup.
I resolved to create my own computer.
Then decided it was too hard and purchased a Dell XPS tower or whatever it was called.
Didn't work out.
I resolved to create my own computer.
Using the scrap parts from literally every system I owned up until that time, including the 100gb drive with Windows XP still installed, I managed to assemble a conglomeration of a PC for cheap off eBay--a feat in its own considering this was the height of the silicon shortage in 2021.
I knew nothing, but I watched a ton of Linus Tech Tips on YouTube and somehow managed to throw together a decent rig using a 6 year old GPU and a new-ish base level CPU. The only problem I was having was that no modern PC case had optical drive slots, and they all had annoying levels of flashy lights. Surely gamers aren't the only people on the planet building computers right? I'm not so sure anymore.
So I picked up this Windows 2000 beast, and gutted it. Said goodbye to the network card because I can acknowledge that Wifi is better, and plugged in a new card. In actuality, it wasn't that simple.
The standard ATX form factor was introduced in 1995, but due to the ever increasing heat output of newer systems, the older cases just aren't made to accommodate large heat syncs and fans. The cases are stifling. So to open up things for more airflow, I did what any PC builder might do. I took a dremel to the case and started cutting. (I did have a plan).
This was my airflow plan, drew it up at the suggestion of a redditor.
GPU actually vents air out the back way, so the lowest fan
is going to take in cold air for that (remember, hot air rises).
Front cold air intake brings air to the CPU and is vented by the power
supply and the case fan.
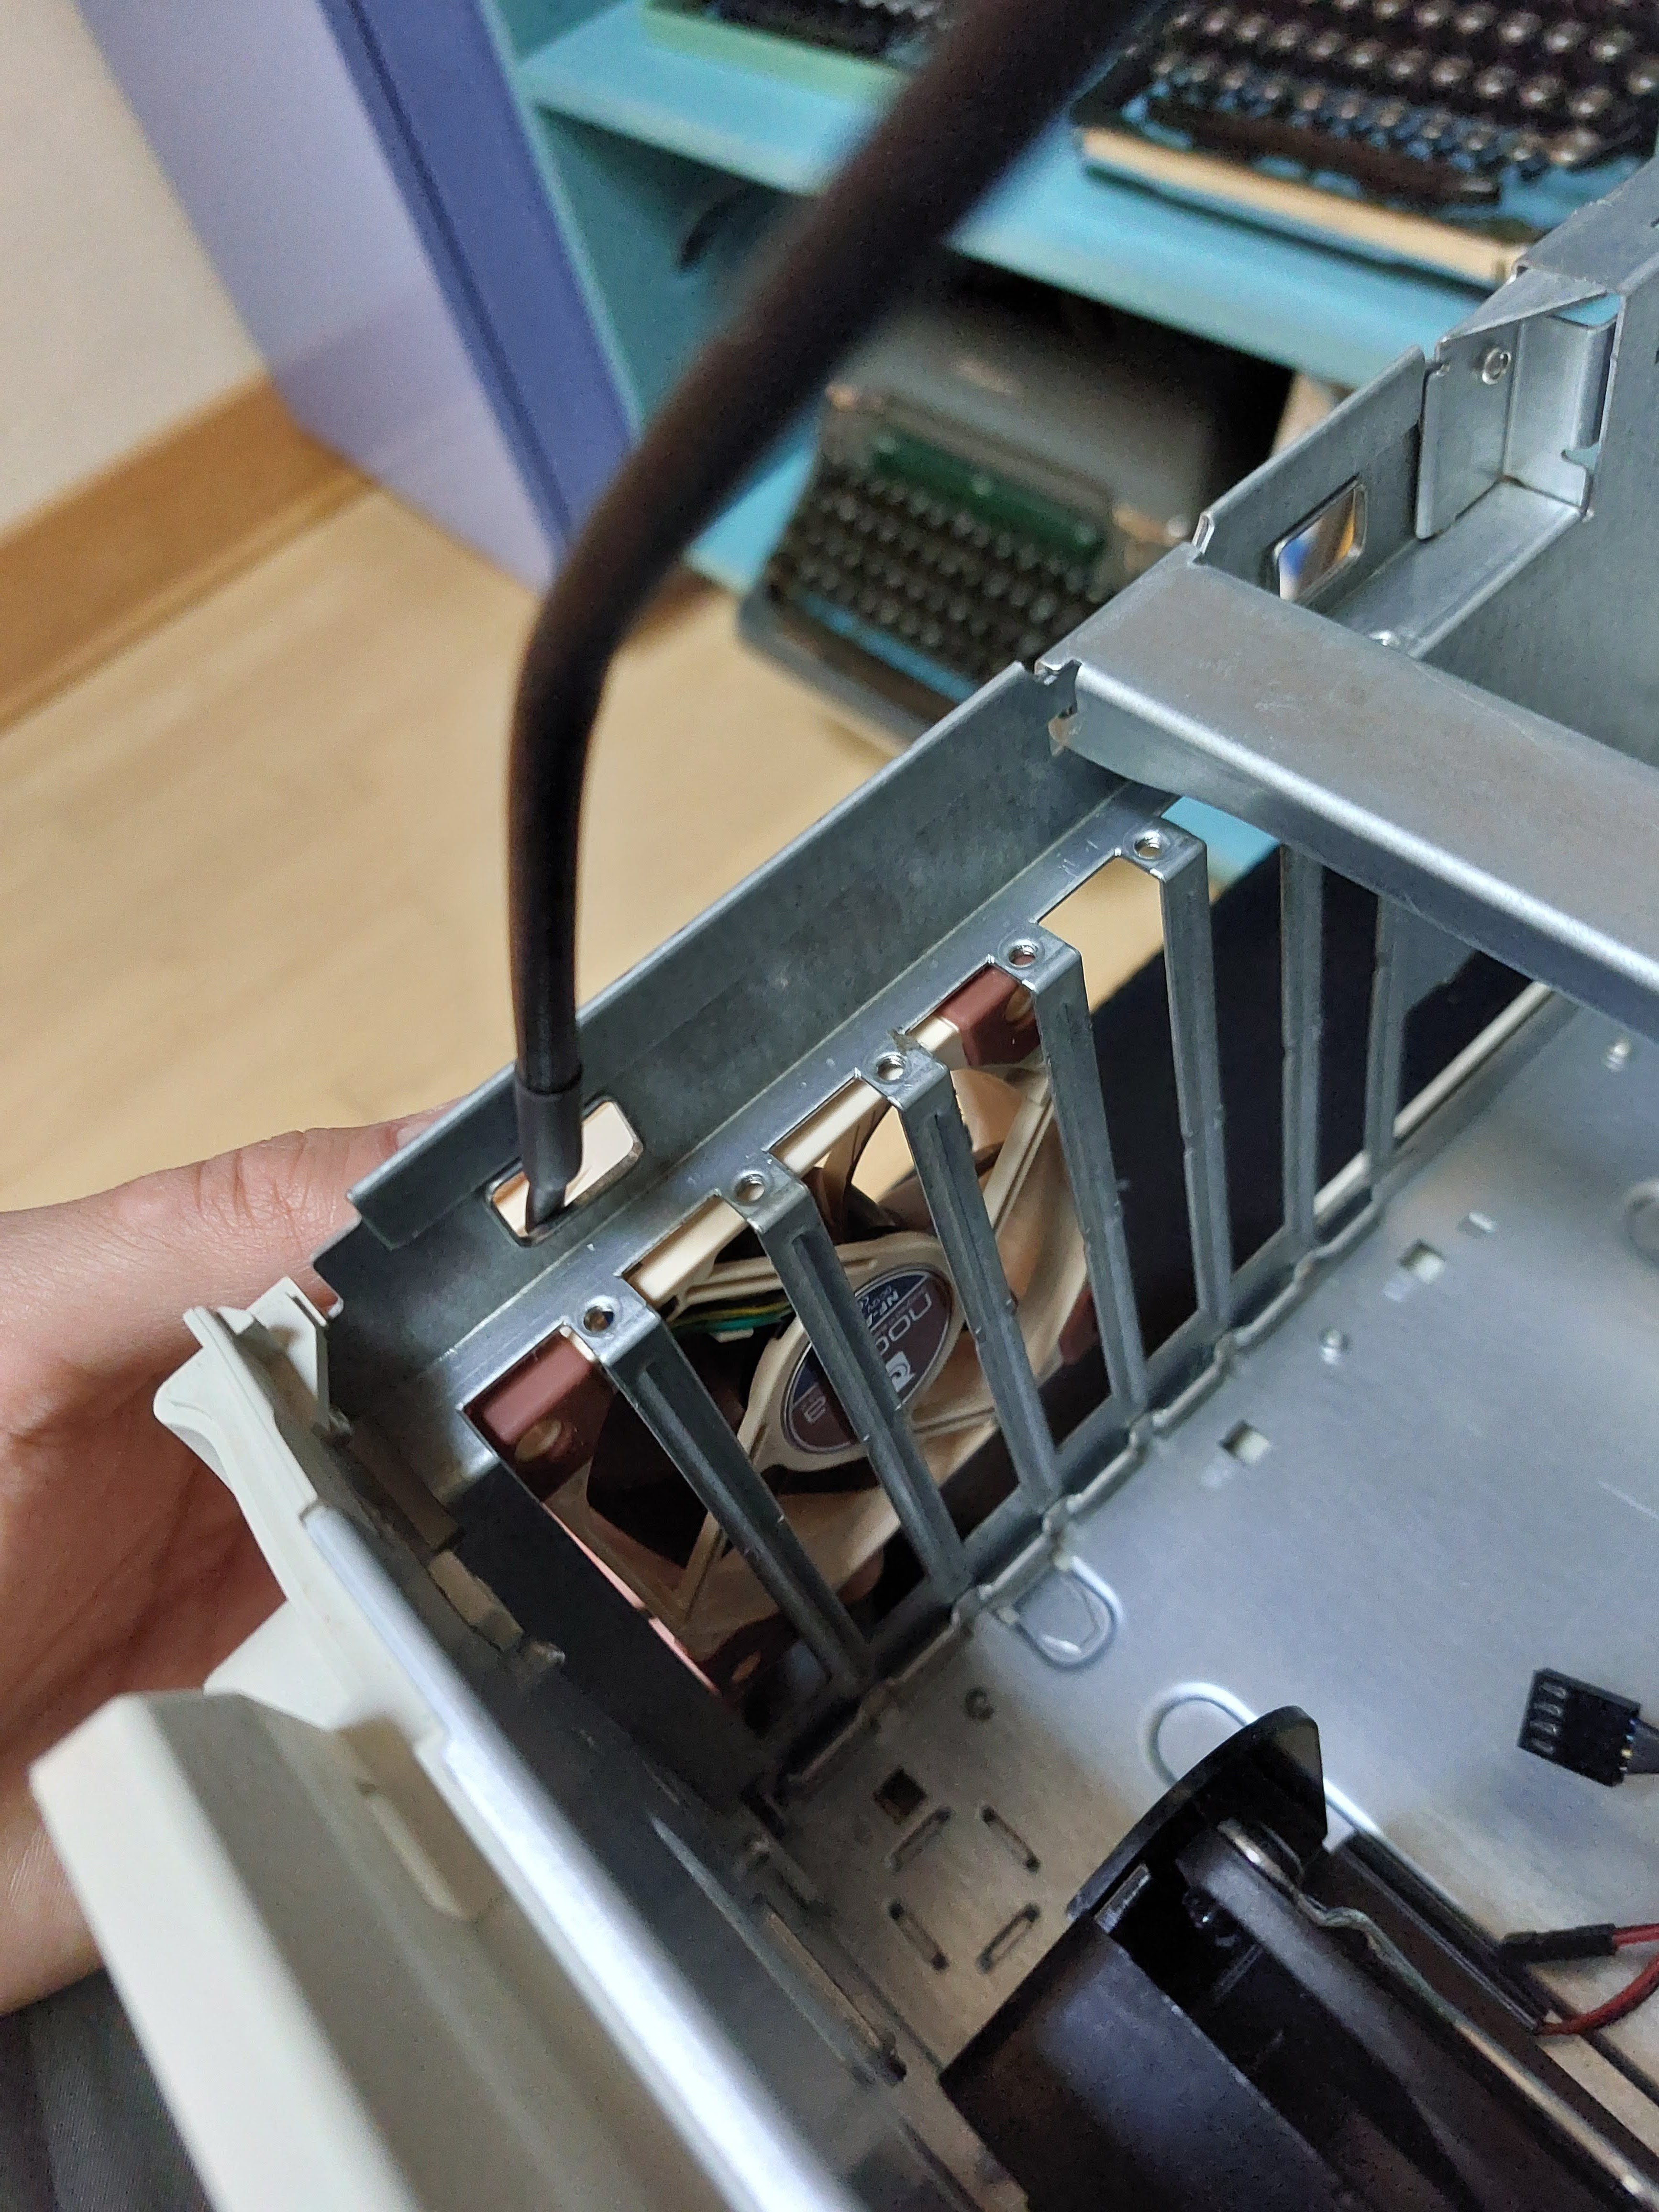
The first thing I made note of once I gutted the system was that there were a few decently sized air intakes on the front. I figured I could get away with mounting a fan to the old hard drive bay and pulling in air for circulation. I also chose a slim Noctua cooler for the CPU that would fit and hopefully drive some decent cooling. The spare drive bay was made out of PVC which proved easy to cut, but the front steel of the case also needed to be cut to improve airflow. This case was only produced with a single fan, I intended on installing at least four more.
Progress began with the front end of the case, which I designated as air intake (pretty typical). Measuring for the fans was supposed to be a simple task, though unbeknownst to me, my ruler was actually stretched by 5mm, so I ended up buying 85mm fans instead of 92. Everything worked out better though, and the 85mm fans ended up serving different purposes that worked out much better.
I do need a new ruler though.
The other part of the puzzle on the front of the case was front IO. USB drives, audio, and of course the power buttons. USB was solved with a panel mount 3.0 cable, audio was forgone, but the power took some work. Dell has this nasty habit of making things super proprietary, which is strange when you're trying to make a system that's universally compatible. Anyway, their front power switches were wired to a thick ribbon cable and some sort of port on the end, rather than GPIO pin connectors. Thankfully, these older printed boards make it pretty easy to follow the traces, so I ended up buying some wires with pin connectors on the end, and soldering to the breakout pins for both power buttons and both power LEDs. Then I cut the ribbon cable, labeled the pins, and was all set!
Some help from a soldering iron and the Dremel opened up the drive bay of the case, and despite my thoughts of success, it wouldn't be the first time I'd mutilate that part.
The power board still fit into the plastic clips on the plastic drive housing, so the next step was to cut a matching hole into the actual case frame. Despite being perforated, there was still way too much metal in the way blocking valuable air flow. I did consider an AIO liquid cooler, but I didn't want to shell out obscene amounts of cash for something that would guarantee zero leaks and zero pump failures. So with air cooling being the tried and true, I needed to make sure I could pull in as much fresh air as possible. I ended up diagonally mounting my 85mm Noctua fan with paperclips and zipties, but a mere hour later I realized I could cut some more plastic and install a 110mm fan which would drive WAY more air.
labeled those pins with whiteout and a pen
My 110mm fan came from my previous PC setup, it was an exhaust fan, and I'm still skeptical it's pulling in as much air as it could. I guess that'll remain to be seen. I used the soldering iron to open up a few holes in the corner supports and used some more zip ties to mount it to the drive casing. Then I test fit the support bar to make sure it fit on the case without any modifications needed to the mount. It filled up the gap way better than the 85mm, and though it might not be the best performing fan, it is still way better due to it's size.


The next step was the front panel USB 3.0 mount. I used a Y split cable, but as you see only one USB port is visible. That's because the second USB port is internal accessing drive A:, which if you didn't know is the floppy drive. Turns out they don't make native 38pin to SATA or anything fancy like that, not that SATA adapters are that great as I find out later. The port is mounted to the drive expansion cover which would be used for either a secondary 3.5 inch floppy drive, or a second zip drive. There are other options out there, but none that were conventionally used. Apparently there exists a 5 and a quarter IDE cassette deck for internal mounting. Weird.


The next stage was test fitting everything up front, and plotting out the rest of the fan placement. I knew I wanted to leave the PCI slots open to get more air from the back end of the case. This would go to help cool the GPU, but also to drive a little more air circulation into the rest of the case. I settled on an internal mount that would sit in front of my WiFi card, and halfway across the GPU. Not the best spot, but if it works it works. The original 92mm exhaust fan was also re-used from the pentium 3 setup, but I had to remove it from the casing since modern ATX boards come equip with large heat syncs these days.
I should mention that these heat syncs also necessitated the removal of this small ridge of metal that was used to hold in the rear IO shield. The Dremel also helped with that.
I took apart my old rig, with the help of my 1910's Stanley ratchet driver, and assembled the new CPU cooler. The fan from the old cooler was reused. There is a small clip that hooks onto the two lower left motherboard mounting holes and that is what secures it to the new case. The board is lowered down onto the pegs, and it is screwed in place from the back which tightens it down onto hooks, rather than traditional screw standoffs. There is a small rubber gumdrop-shaped riser that pokes the CPU backplate, that needs to be removed. The exhaust fan was installed on top with double sided tape and duct tape, and then my 500 watt power supply was also installed. Cable management is not my forte, but vitally important to maximize airflow. There are no hidden panels to hid cables behind in this rig.


Easily my sketchiest fan mount ever is the lowest case fan under the GPU which is held in place via friction. I used the rubber bumper from behind the CPU to press the fan up into the GPU, pinning it into place. Horrible, I know. My other smaller fan which was zip-tied to the support rail ended up getting hung up on the GPU, so I cut the bar in half and later installed a second modified 110mm Fan.
My HDD from my very first PC, the XP rig, was mounted, and the SSD from my laptop was double sided taped to the bottom. You can see where I cut the corner for the larger fan so it could sit flush against the motherboard SATA ports. I ended up saying goodbye to my HDD in the name of airflow, and tucked the SSD into the back of the case.
The next problem were the darn IDE adapters. They just didn't work reliably. At first, they were preventing my system from even booting into BIOS. After a lot of fiddling, I was able to get my system to boot from the M.2 drive installed on the motherboard like it was supposed to. The floppy worked great and appeared in My Computer each time, but neither the Zip drive or the CD drive would show up no matter what I did. Finally, the CD drive decided to show up at random after lots of fiddling, and it worked for a little while before breaking again. Eventually I figured that my darn SATA cables were missing the little clip bump on the bottom and weren't making proper connections, so I jammed a piece of paper into the port and it worked like a charm. Albeit super loud, louder than I recall older 2000s drives being, and I had two on my first system. DVD and CDRom.
The IDE adapters take 15 pin SATA power and a standard SATA connection, then branch off to 4 pin Molex to power the drive. You can power the drive with the Molex connector off your PSU, but you still need 15 pin SATA to power the adapter. Leaving the power header exposed will cause electrical arcing. So don't do that.
At the end of the day, I swapped the CD drive for DVD anyway. I scored a nice white face 2011 DVD drive that is native SATA and 5.25" which is somewhat of a rarity. That just takes 15pin SATA power and 5 pin data like normal. The Zip drive will receive further tuning, but the prevailing idea at the time of writing this is to use one of the extra USB 2.0 front headers on the motherboard to adapt the Zip drive to USB. Yet finding the right Zip to USB proves tricky.
Sadly lost the front audio dial and headphone jack
The case did not close at this point, which was a shame. The 6 pin VGA power cable for the GPU actually stuck out way too much, so I ended up having to order a 180 degree power adapter. That will allow my VGA cable to plug in from the other side. In the name of airflow and cable management, I also got a 24 pin right angle adapter for the motherboard power. This will allow me to tuck my power cable behind the zip and floppy drives, keeping it largely out of the way.


It was at this point that I discovered two catastrophic failures. First, the rear exhaust fan that came with the system was a two pin fan with the pins in the wrong spot. This meant that it was no longer exhausting any hot air off the CPU, instead, the power supply fan was taking the hot air and venting it out the back. This means that the PSU was not getting a fresh supply of cold air. I used my spare fan and screwed it into the back, not the best, but it worked. The other failure was the power supply itself. I got the blue screen of death in the middle of a zoom meeting. Yes, not the best idea to be building your main system and use it at the same time, but it is my only working computer, I once ran the entire system built in a cardboard box for a few weeks.
As it turns out, the 500 watt power supply didn't give quite enough juice to the system, especially after adding a hungry 20 year old CDrom. I expect the 2011 DVD drive to take less power, but I am still overdrawing the power output on max load by almost 180 watts. I have a funny feeling that doing that is really bad. Yet there remains good news: the DVD drive is actually almost a full inch shorter, SATA seems to be more compact than IDE which would make sense. That, coupled with the fact that I no longer need an IDE adapter gives me much needed room for a larger power supply, an Evga 850 Watt Gold series (which is apparently better than the bronze series I have been abusing for the better part of six months. A real shame to have to replace such a lightly used piece of equipment, but it only cost me 45$ and is probably at the root of my data failure problems. If all goes well, everything will run smoothly and certainly not catch fire.
At this point, I fired up HWM monitor and Counter Strike (which I had never played before but it was free) and tested CPU temperatures under load. After a couple hours of people mocking me over the internet, I came away with a series of wins, and to my surprise the hottest core on my CPU was only 57 degrees. Impressive for a small air cooler in a stifling case. Pulling air from the front vents with two fans, plus the help from the rear PCI slots certainly helped me out. Of course I will run into a dust problem down the line, but a bi-monthly or even an annual hit with an air compressor should deal with that no problem.

And that is essentially the final setup. An 850 Watt power supply running a Core i7 and a GTX 1060. Not the fastest or most powerful setup in 2022, but it handles everything I need it to, including intensive editing on massive 16 bit raw files for photography. The zip drive is still dead, but I am hoping to troubleshoot that later on with a better SATA cable, and possibly a replacement drive if all else fails. Until then, this system is essentially complete and running smoothly. At all stages of the build I actually had it fired up to write this blog!
At the moment, I feel inspired to try and upgrade an old IBM 5150. A broken unit, as I'd never butcher a working 5150, but for now my budget is dried up and my wallet is screaming. Back to fixing typewriters, what I do best.


Nice! What generation i7?
ReplyDeleteA tenth gen I believe!
DeleteGreat post! I love how detailed your PC upgrade journey is. The step-by-step breakdown makes it super helpful for beginners. Well done! Best ASUS Gaming Mouse Reviews and Buying Guide
ReplyDeleteUpgrading your PC can give it a new life and boost performance significantly. Always consider your use case when selecting parts and ensure compatibility with your existing hardware. If you're unsure about specific components or need advice on choosing the best options, feel free to share your current specs or ask for recommendations! I can recommend you a site sell laptop near me
ReplyDeleteIt is always exciting to upgrade a PC! Every small improvement matters, whether it's upgrading cooling, replacing an outdated GPU, or adding more RAM. Getting the optimal performance for your system is the main goal. If you're looking to buy computer accessories online in Pakistan, there are plenty of options to find exactly what you need without the hassle of visiting multiple stores. When you want to improve performance, what do you upgrade first: cooling, graphics, or storage?
ReplyDelete