"The Greatest Achievement in Typewriter History," or so they claimed with the launch of the Emerson in 1909. If I think about mechanically superiors machines available at the time, several come to mind. Regardless, this machine did come with the perk of a backspace, something Hammond was selling in a box. At $50, complete with with a shady decimal tab, and dubious amounts of praise, the Emerson threatened to revolutionize front strike typing. However, greed and poor decision making ran the company into the ground before it could even get off it. It was as if the Wright brothers made a tunnel boring machine on accident. All was not lost for the Emerson Company however, as in 1911, the factory and rights were purchased by Sears and Roebuck--not the company, the guys. After many trials and tribulations, including the departure of one of the company's founding partners; Mr. Sears, armed with millions of dollars from selling things through the mail (sound familiar?), purchased the Emerson company as a pet project. Such goes the lives of rich people.
Alvah Roebuck continued the manufacture as president of the Emerson Co. in Woodstock Illinois, an industrialized suburb outside of Chicago where the Oliver was also manufactured. The Emerson Company had already been in operation there since 1910. Under new management, it became the Roebuck Typewriter Company and in 1913, Alvah Roebuck filed for new four bank front strike patents. These patents came to fruition a year later as the Woodstock No. 3 of the Woodstock Typewriter Company. Production began in the fall of 1914, and remaining Emerson stock and parts were sold off to Harry Smith of the Smith Typewriter Company, a vey successful sales firm.

The Emerson 3 here came from a collector who was primarily interested in a well-working Emerson, something one would be hard pressed to come across. The Emerson features typebars that swing from left and right striking the front of the platen. These are actuated by linkages which pull on pivots similar to the crankshaft in an engine. The shift and figure moves the type frame up or down to print either of the three characters on the slugs, all of which are indexed through a hole in the type guide for improved alignment.
This example, while fabulous in paint and decals, had a great amount of internal surface rust and worn parts. The rack for the carriage was chewed up, the figure key was damaged, the line spacer stop was missing, the selector was broken, bell striker was gone, etc etc. It was anything but well-working.
A pre-restoration underside view
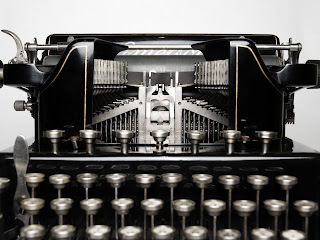
a look at how the type rods are divided
between three separator bars (top removed)
Usually with a project like this, I pull the machine apart into sections and work each one through to completion. Unfortunately, the Emerson had no clear breaks in its mechanisms, each part was directly connected to another. Therefore, the entire machine had to be dismantled down to the frame. I started with the carriage of course, which comes off just like an Underwood 5, two screws on the rear carriage rail.
carriage off and disassembled
note the geared return that slips on the left
end of the platen rod, there is a channel that
accommodates a spring for the detent.
Feed rollers go in long side facing out, held on
top of a V spring by two fixed pins
Once the carriage was taken care of, I started working on the insides. The escapement trip arm and the ribbon system are all interconnected, and the ribbon drive pin fits into the trip arm as well. That came off as a unit. All bearing rods unscrewed from the right of the frame, the upper padded rod (which needed new rubber) the keylever bearing, the three separator rods, and the shift rod all came out of the machine. The keylever bearing rod has flat head screw slots on either side, but those are not needed as there are no screws, instead the rod is held in on the inside right of the frame with a U bracket that slots into a recessed groove in the rod.
there's the groove
along the right, the screw is the bar spring bracket,
just below is the sickle shaped retainer for the keylever bearing
and below that is the slider for the shift rails
this is the shift bearing, you can see it above the row of
adjusting screws for the key tension, and below the cog of the
right ribbon spool. The left side is where all the magic happens,
it slots into both ends of the shift and figure key levers
removing the bar spring rod, there is a hair spring
that props up the ribbon color select key. Tab rods are also on the
keylever bearing.
Ribbon and escapement bracket, held in with two
screws around the backside.
Once the machine was taken apart (the tricky part was all the hooked linkages), each part got thoroughly de-rusted. Each cylindrical rod of the type bars bends at the top to form the crankshaft-like shape, that bend is narrower in width than the rest of the rod, so with the rubber bumper rod out of the machine, the hooks can be maneuvered up to that point and popped off.


two of the three separator rods
shift slides
type basket?
All of that was a lot of work, but pretty straightforward and simple in actuation. The bigger problem was the missing ribbon spool post. Now the broken bits could be jerry-rigged to work alright, but as nobody was willing to part out an Emerson, the spool post needed to be fabricated. Somewhere down the line, a user discarded the proprietary Emerson spool in favor of a Universal, and removed the wider diameter post to accommodate it. I don't own a lathe, so I ended up casting in aluminum, drilling a hole, tapping threads, filing, and installing an index pin. It was a lot of work.

Now, the first thing to do was to make a mould of the original part. This was done with a method known as delft clay casting. It uses an oil bonded sand to form around a part in a split mould. You then remove the part, and fill the cavity with the metal. This is as opposed to lost wax or lost foam where you would make the part out of wax or foam, and then melt it out of a plaster mould as it cools. Delft clay is much less precise, but also easier and faster.
The first half of the mould is carefully packed and smoothed, then the object is pressed in halfway. A layer of talc acts as a mould release agent, and the second layer is packed directly on top. Once the object is removed, the pour hole is made, along with several vent holes to allow the air to escape. That step is critical in creating a solid pour without bubbles.
I chose to melt aluminum as opposed to zinc or bronze due to its faster melting times, and recyclability. I used old soda cans and a fire extinguisher to gather a healthy puddle of aluminum. The pour was a little overzealous, but it worked out alright in the end. Borax in the crucible acted as a flux to help keep the oxide down, and if you've ever tried to weld aluminum, you know why that's a problem.
Once the object was removed and filed down, it was time to do all the extra bits like drilling and pin-putting. In the end, it wasn't a perfect copy, but it worked just as well. An Olivetti spool was modified to fit, and works great.
see one of the central brackets cut out to
fit the index pin
working!
The spread was something, and so were the results. I normally don't lay out all the parts since I work in sections, but when it does happen on the rare occasion, it looks pretty cool. It's a pretty simple machine in theory, but all the adjustments take time. The key levers and rubber rod go back in first, then the shift rod, sliders, and finally the type frame. It would be helpful to put the ribbon lift system in before the type frame. Each type bar was then adjusted via the twist link to both rest firmly against the felt pad, and to strike within the guide. There are two internal springs from the lower separator rid that hold onto the bottom of the type frame for return on figure. Figure and shift both have a spring, the figure spring stretches over to the top separator bar, while the shift spring fits on a rod extending from the machine frame.
The escapement is pretty easy, just make sure range of motion is there, along with the adjustable rocker return spring to the back frame. The hairspring for the color selector also needs to be in place for the lift mechanism to move freely. This will help give free range of motion to the escapement trip linkage. If the carriage is not advancing, make sure the backspace is not engaging the rack, this can be adjusted with a square bolt underneath the machine, just make sure the backspace key spring is in place (exactly mirroring the shift on the other side).
Feed rollers were next, using a small knife I bent the tabs on one side to redo the rubber, and then flattened them again with the screwdriver.
all clean!
Had some good music playing as this went together. My D5
is indeed missing transport switches.
And that was that. It is not a fast machine, but it types nicely and feels a bit like a Corona 3 in terms of key travel and rebound. The spacebar is also stiff and needs a good hit. It has no left margin, but rather you return the carriage to the end of the rack. The right margin is slide adjustable, but the drop catch tends to get bent easily so it is very unreliable. Otherwise, it is a cool and unique machine, all shined up and ready for a photoshoot.
clean underside


Impressive work, and excellent description of your process!
ReplyDeleteNice pics of your knolling too :D
I try my best, but Adam Savage is the true knoller ;)
DeleteExcellent restoration and documentation!
ReplyDeleteMy Emerson does have a left margin. Maybe you're just missing the stop?
Well documented ... a savior of Antique Typewriters, Photographer, Blogger, Illustrator. Where is the end to your talent. So pleased to have met you. I can hardly wait to type a paragraph on this machine while watching the ribbon move along its path. Thank you!
ReplyDeleteIf you ever wan to sell this Emerson typewriter please let me know. Thanks, Ernie
ReplyDelete